Setting Up Time Tracking for Employees in Kigana
Kigana is a comprehensive childcare management platform that offers various features to simplify the administrative tasks involved in running a childcare center. One of the key features is the time tracking functionality, which allows you to manage and monitor the working hours of your employees. In this help article, we will guide you through the process of setting up time tracking for your employees on the Kigana web browser platform.
Please note that before setting up time tracking for employees, you need to have already created a childcare center in Kigana. If you haven't done so, please refer to our guide on "Create a center" for detailed instructions.
Once you have created your childcare center, follow the steps below to set up time tracking for your employees:
Step 1: Logging in to Kigana
- Open your preferred web browser and visit the Kigana website (https://kigana.com).
- Click on the "Login" button located at the top right corner of the page.
- Enter your login credentials (email address and password) and click on the "Sign In" button.
Step 2: Navigating to Team Management
- After successfully logging in, you will be directed to the Kigana dashboard.
- On the left-hand side of the dashboard, you will find a navigation menu. Click on the "Team" tab to access the employee management section.
Step 3: Setting Up Working Hours for Employees
-
In the team management section, you will see a list of all the employees associated with your childcare center.
-
Locate the employee for whom you want to set up working hours and click on their name to access their profile.
-
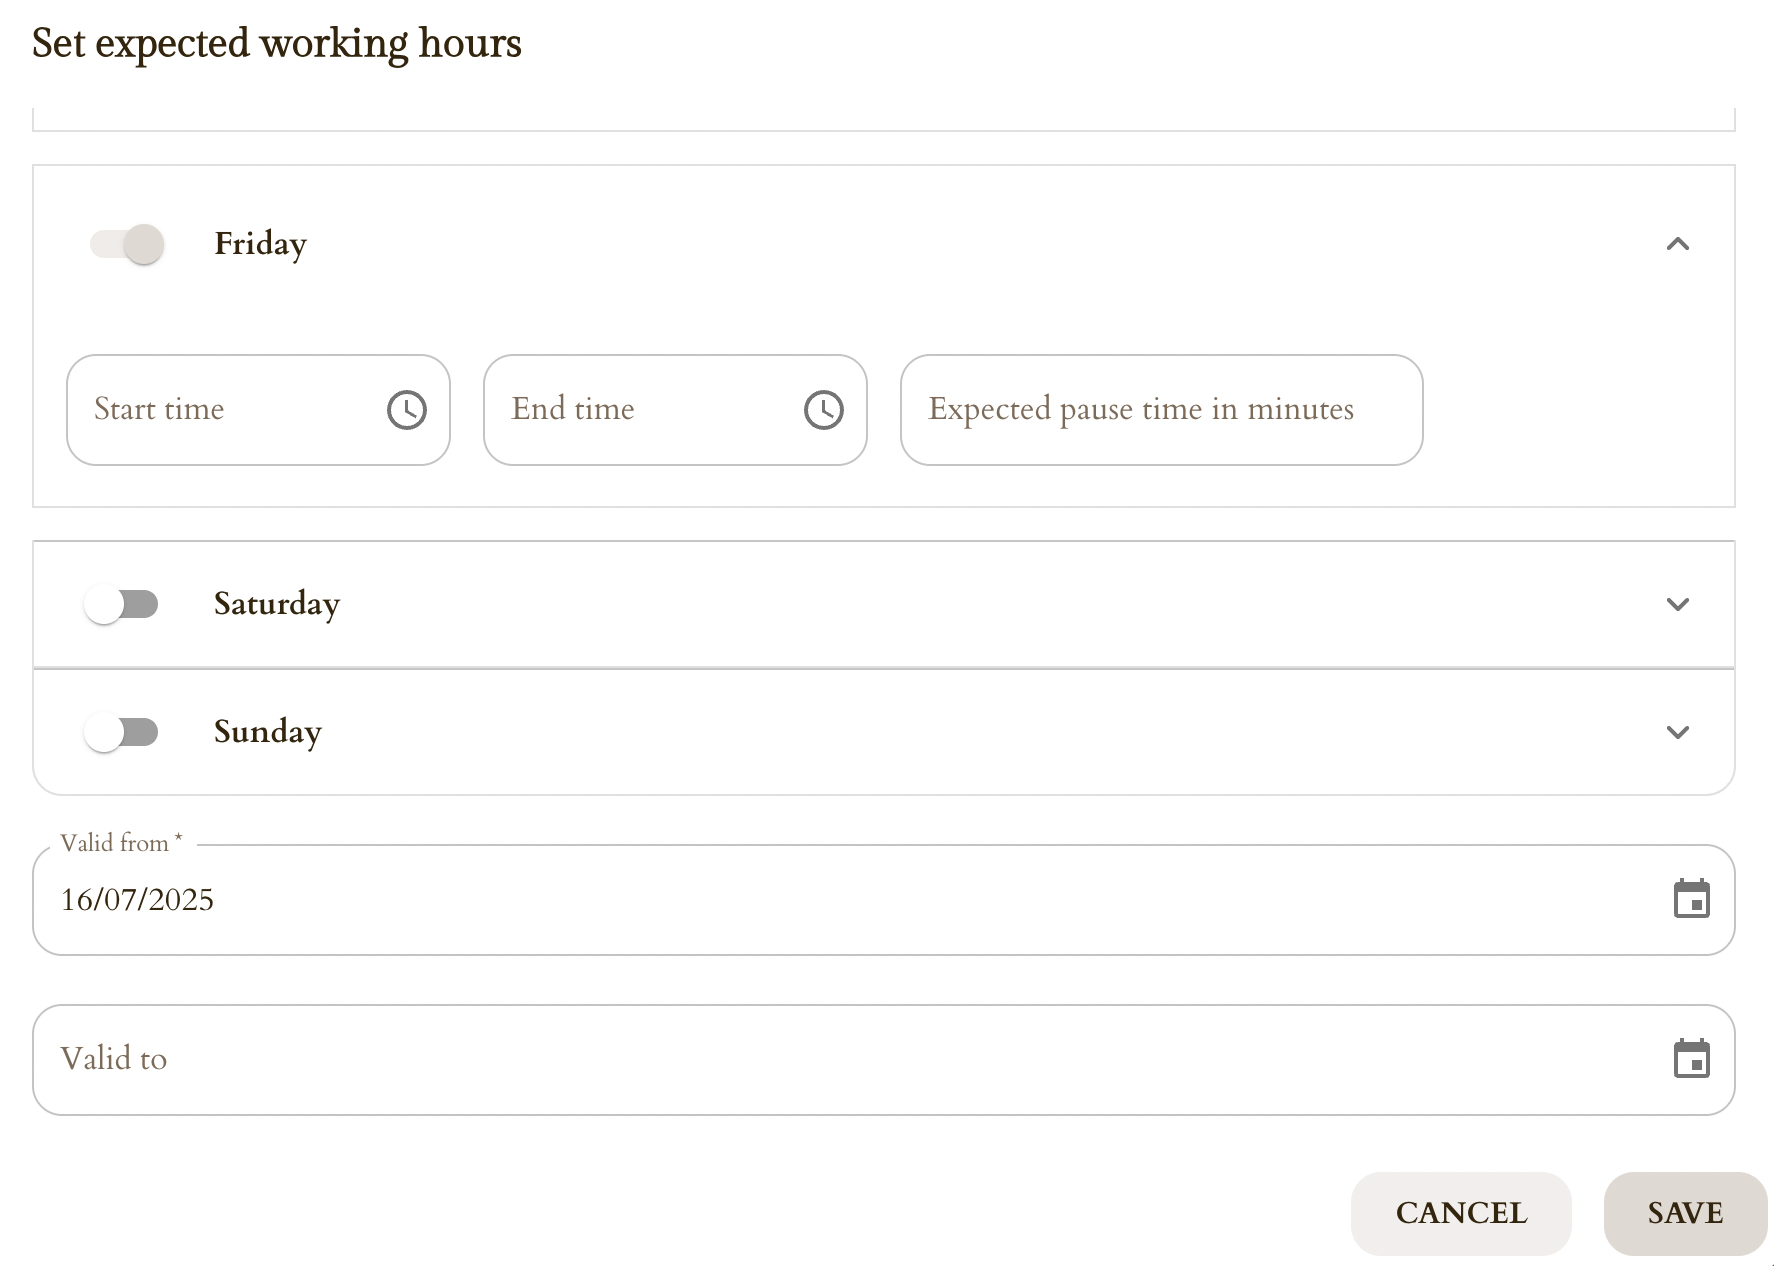
Within the employee profile, you will find an "Expected working hours" section.

-
By default, the working hours will be empty. Click on the "Add" button or the plus icon to make changes.
-
Enter the employee's working hours by filling out the following information:
- Specify the number of work hours per day
- Specify the number of pause hours per day (optional)
- Specify the starting date of the working hours
- Specify the end date of the working hours (optional)
-
Once you have entered the working hours, click on the "Save" button to save the changes.
Step 4: Inviting Employees to Use Time Tracking
- After setting up working hours for an employee, navigate back to the employee profile.
- Verify that the employee has an active account by finding the "Account" section.
- If the employee doesn't have a Kigana account yet, refer to the "Invite a team member" guide to invite them.
Step 5: Monitoring Over and Under Hours
- As an administrator, you can view over and under hours for your employees.
- Return to the Kigana dashboard and click on the "Time Tracking" tab in the navigation menu.
- On the Time Tracking page, select the employee that you want to see statistics about in the upper right corner.
- You will see a summary of each employee's tracked hours, including any over or under hours.
- Employees can also view their own over and under hours by logging into their Kigana account and accessing the time tracking section.